How to change battery timing?
How to change battery timing for Solis inverters?
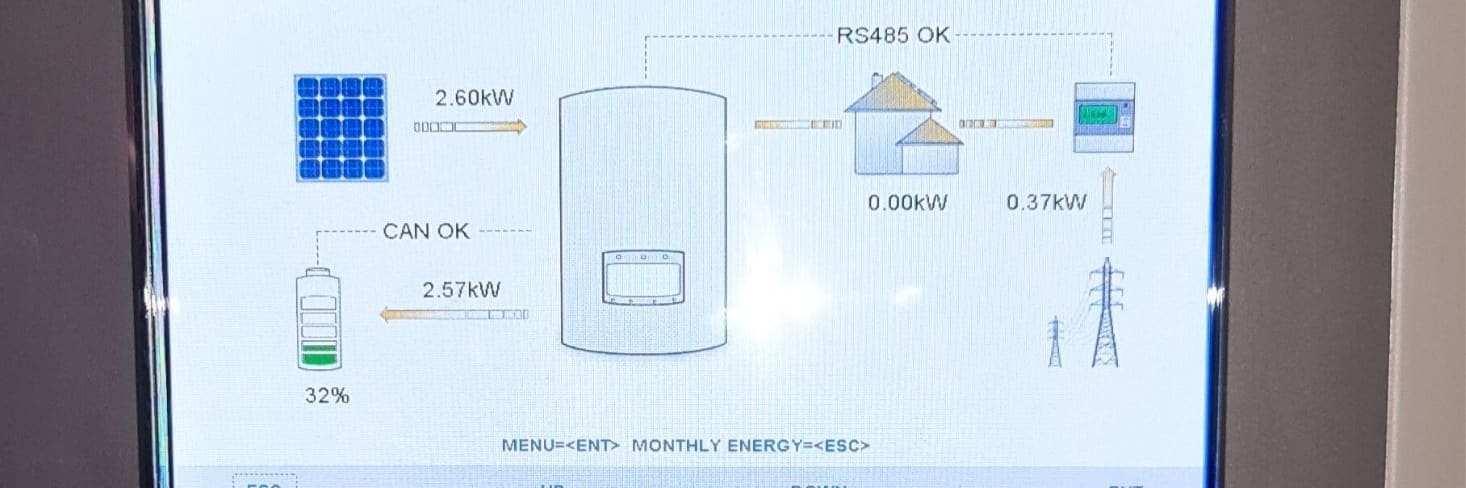
This guide shows you how to change the charge and discharge times on your Solis inverter. Follow the steps exactly as shown on screen. No tools needed, just use the inverter buttons to navigate and set the correct timings.
Step 1: Familiarise with buttons
There are 4 buttons on the inverter. The buttons are labelled as follows:
- Escape
- Up
- Down
- Enter
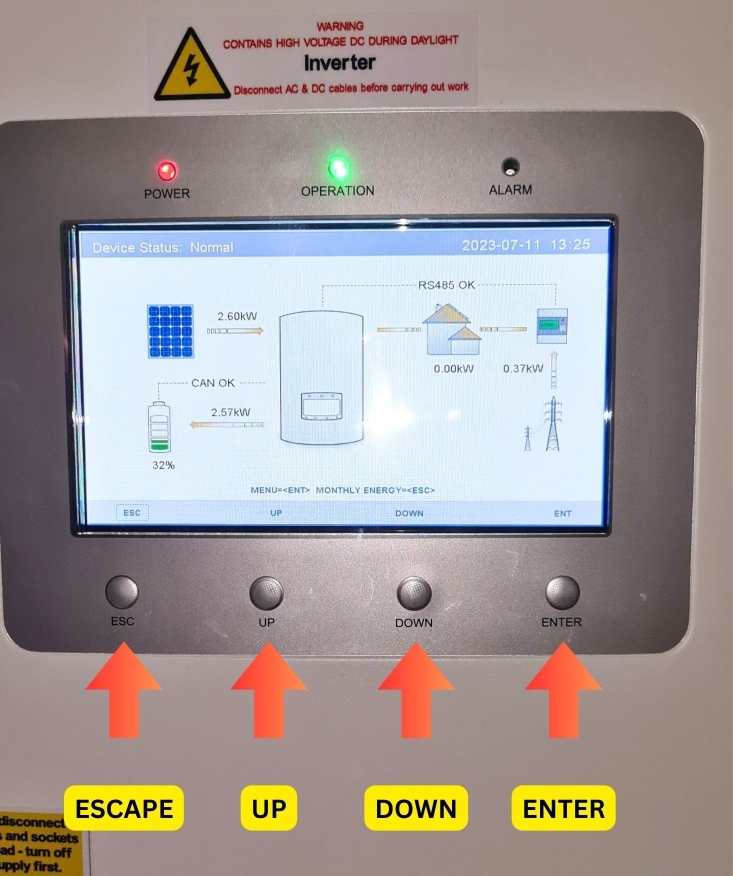
If a menu is highlighted blue, this is the tab you are currently on. Press up / down to select the desired tab and press enter to proceed into that menu.
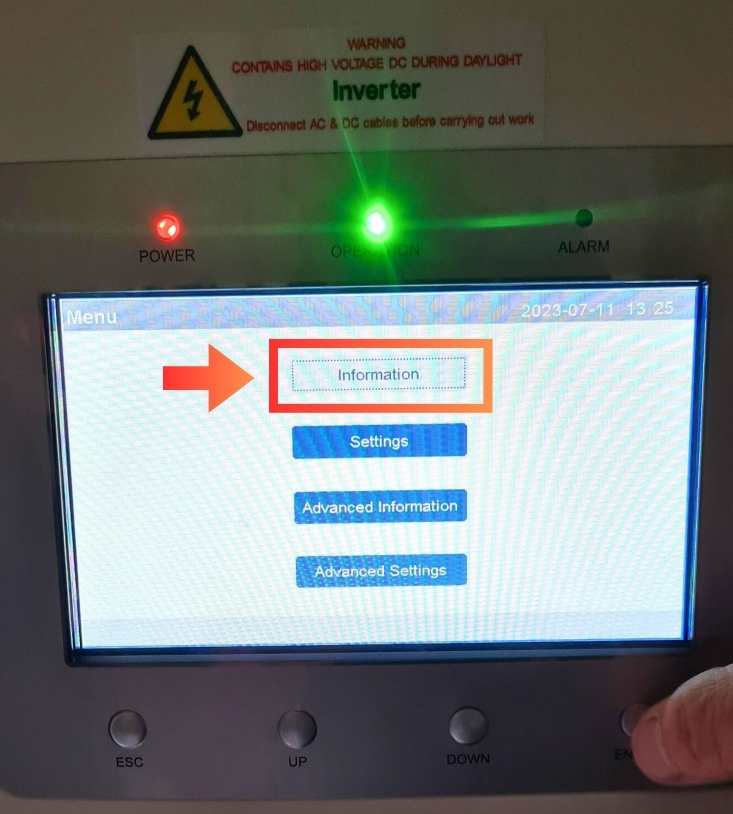
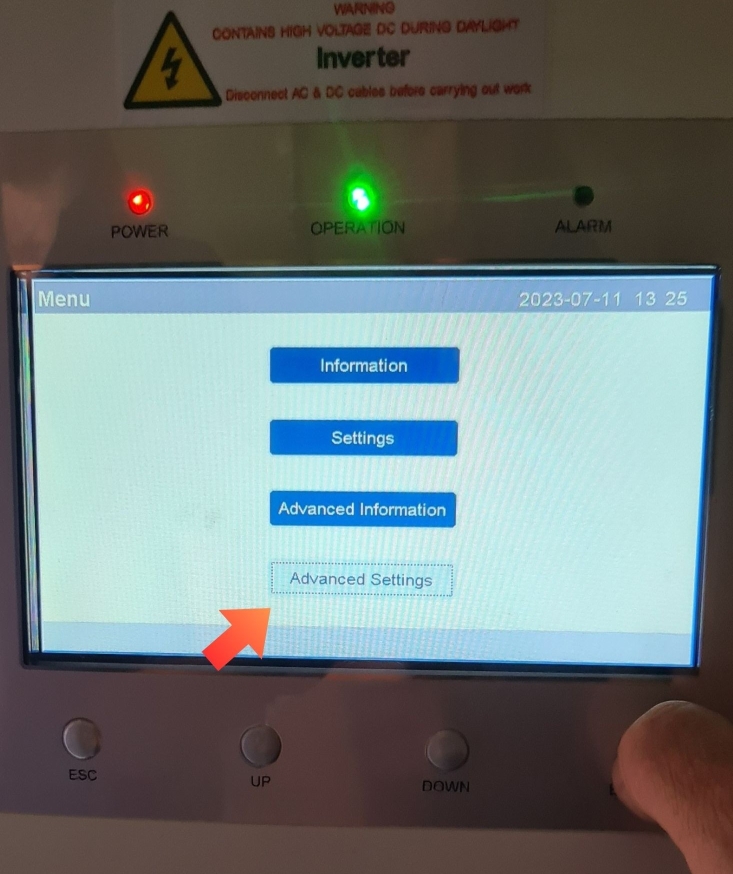
Step 2: Access advanced settings
Press down until "Advanced Settings" is highlighted and press enter.
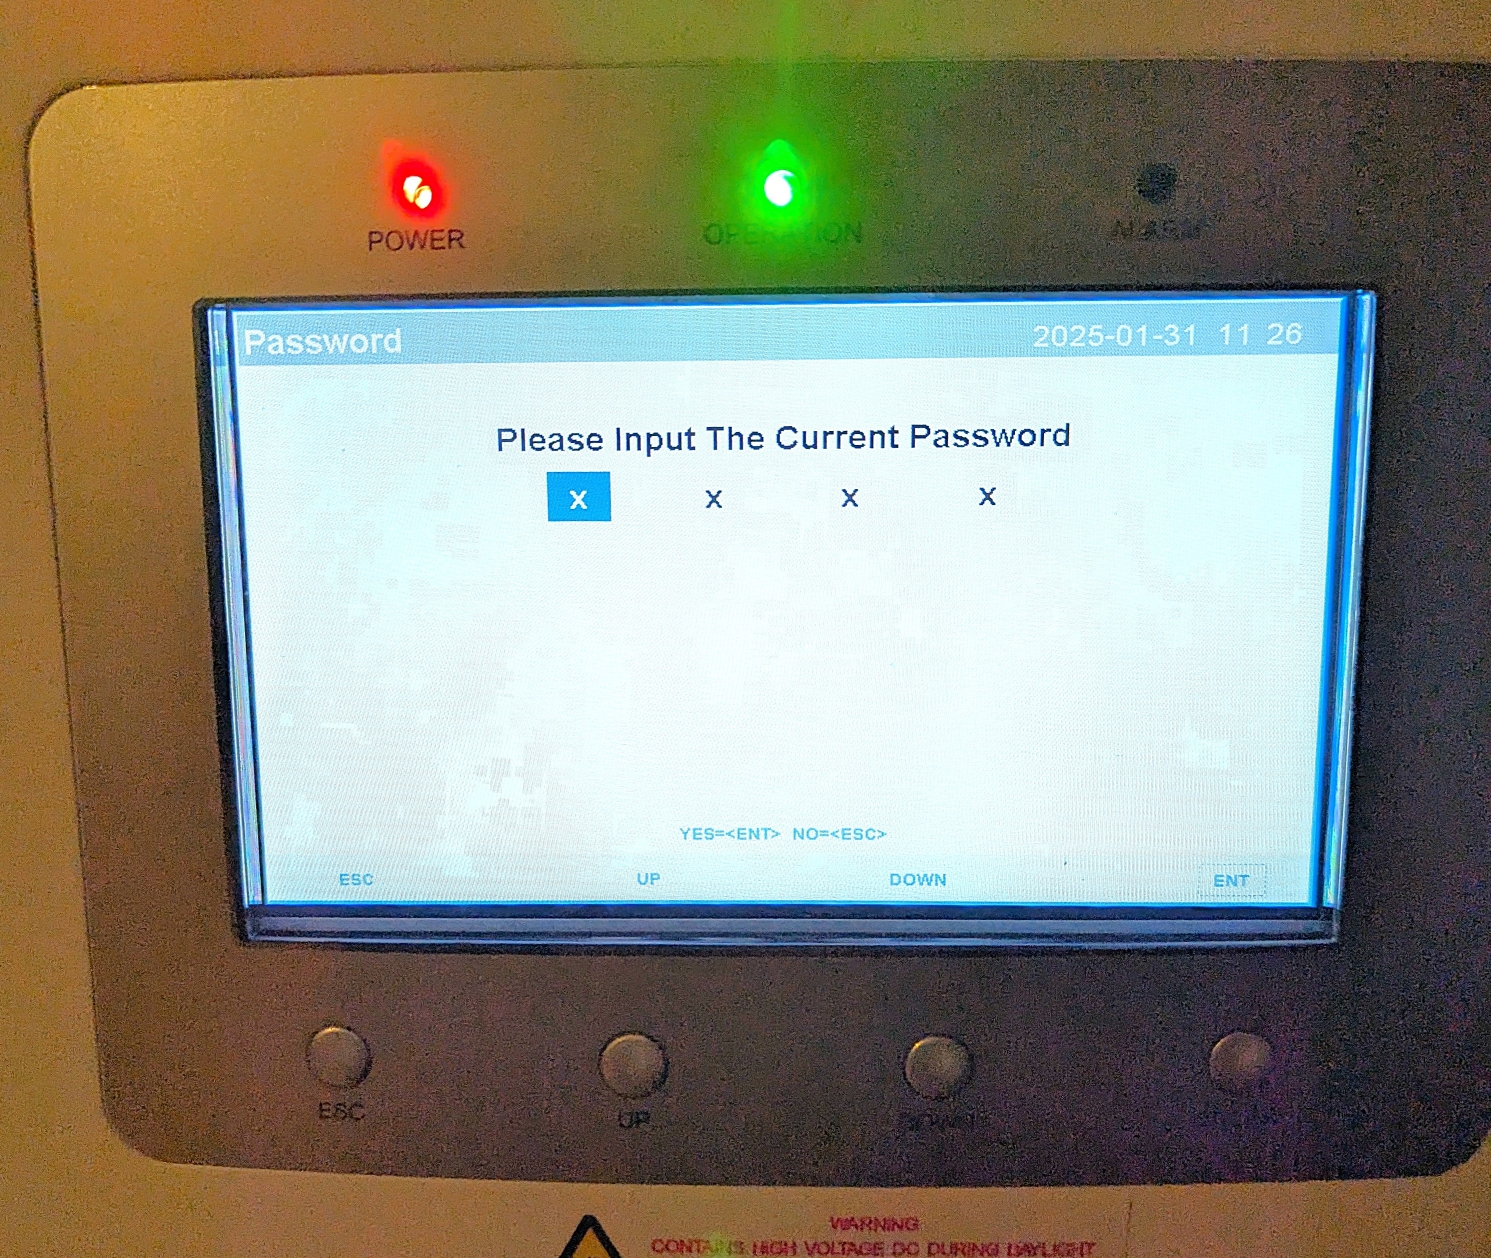
Enter the password
To proceed into the advanced settings, a password will be requested.
- Press down, down, up, enter to input the standard advance password of 0010
The advanced settings screen will display. Your screen may have slight variations depending on what version firmware your inverter has.
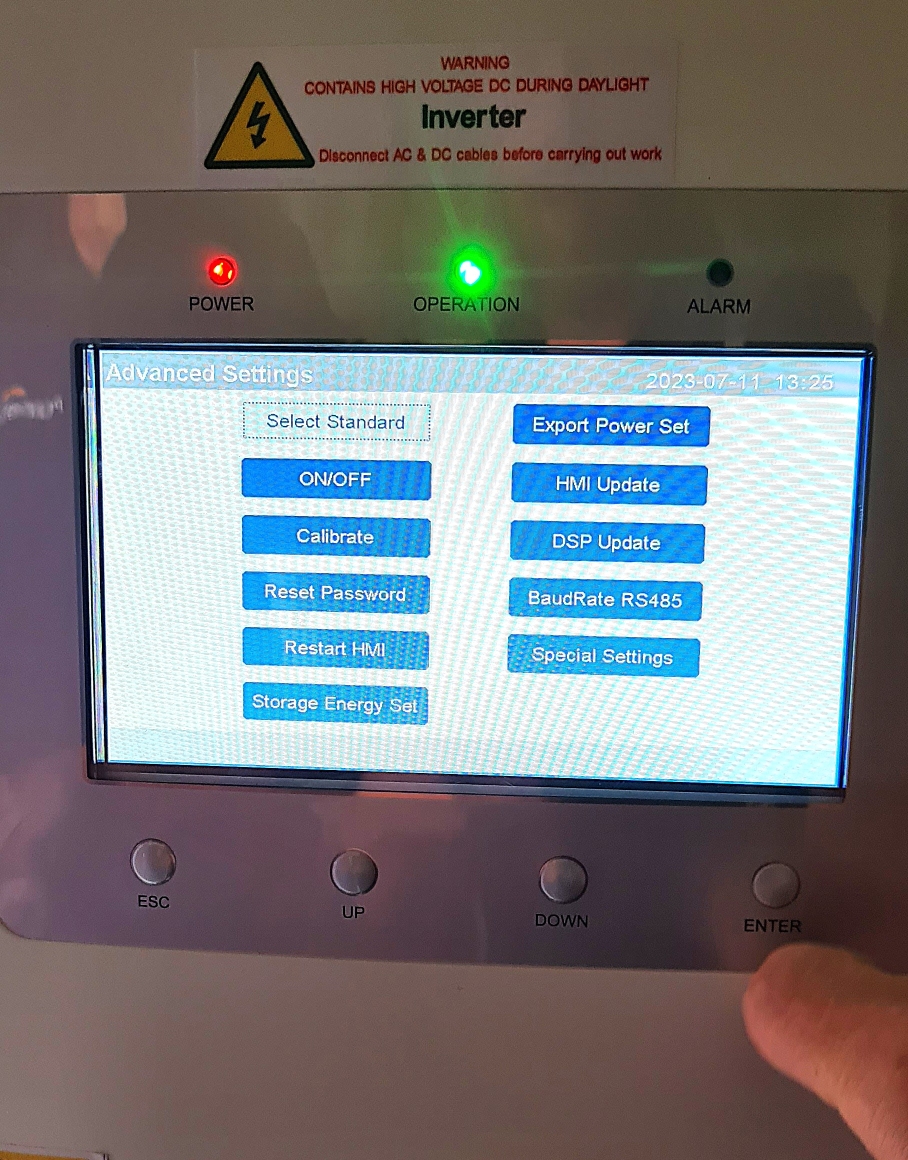
Step 3: Access storage mode select
To change battery charging times, press down until "Storage Energy Set" is highlighted and press enter.
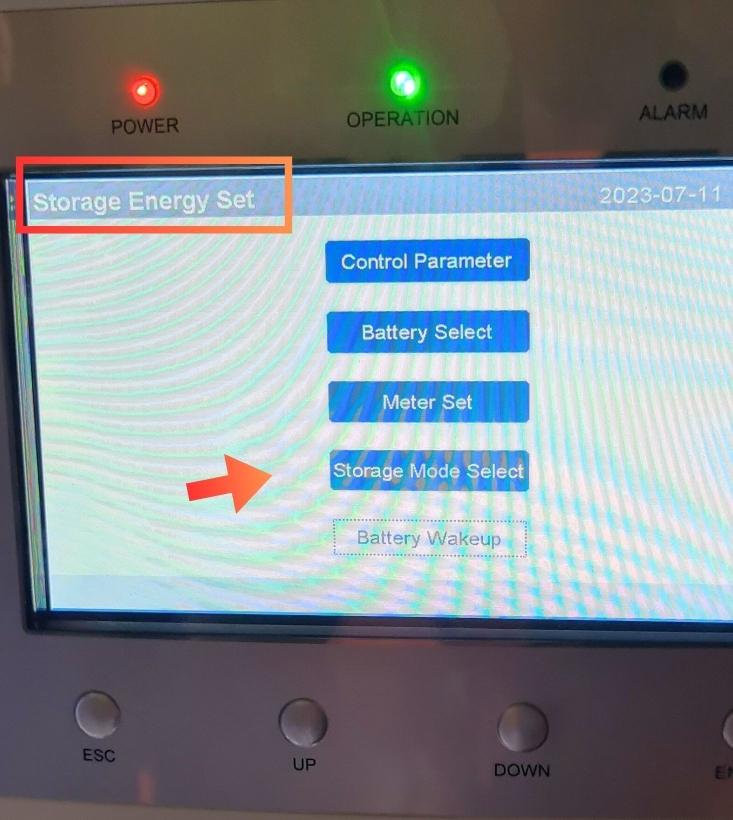
The screen will show the "Storage Energy Set" menu. Press down until "Storage Mode Select" is highlighted and press enter.
Step 4: Select time of use
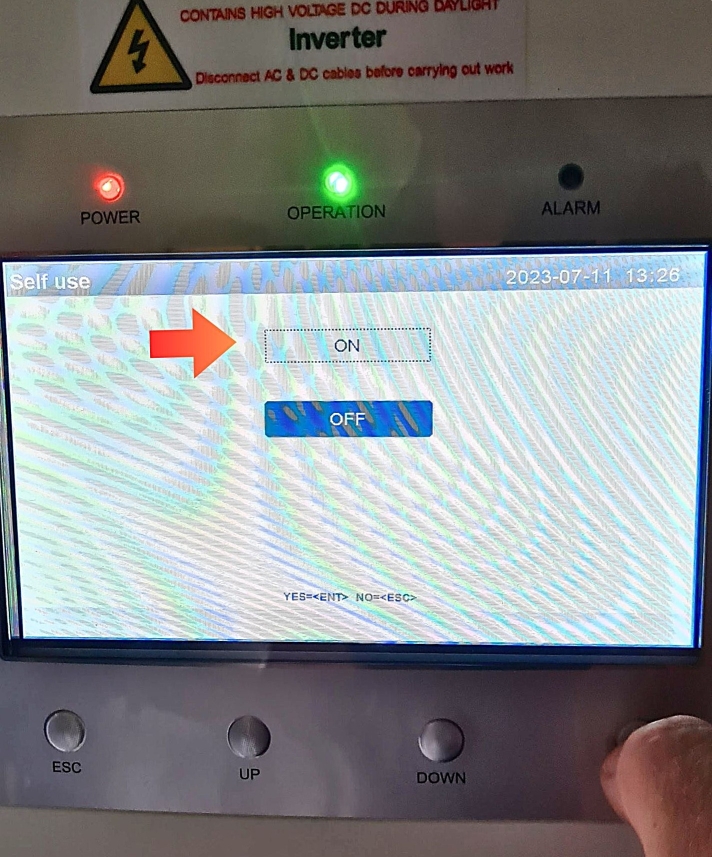
By default "Self Use" will display.
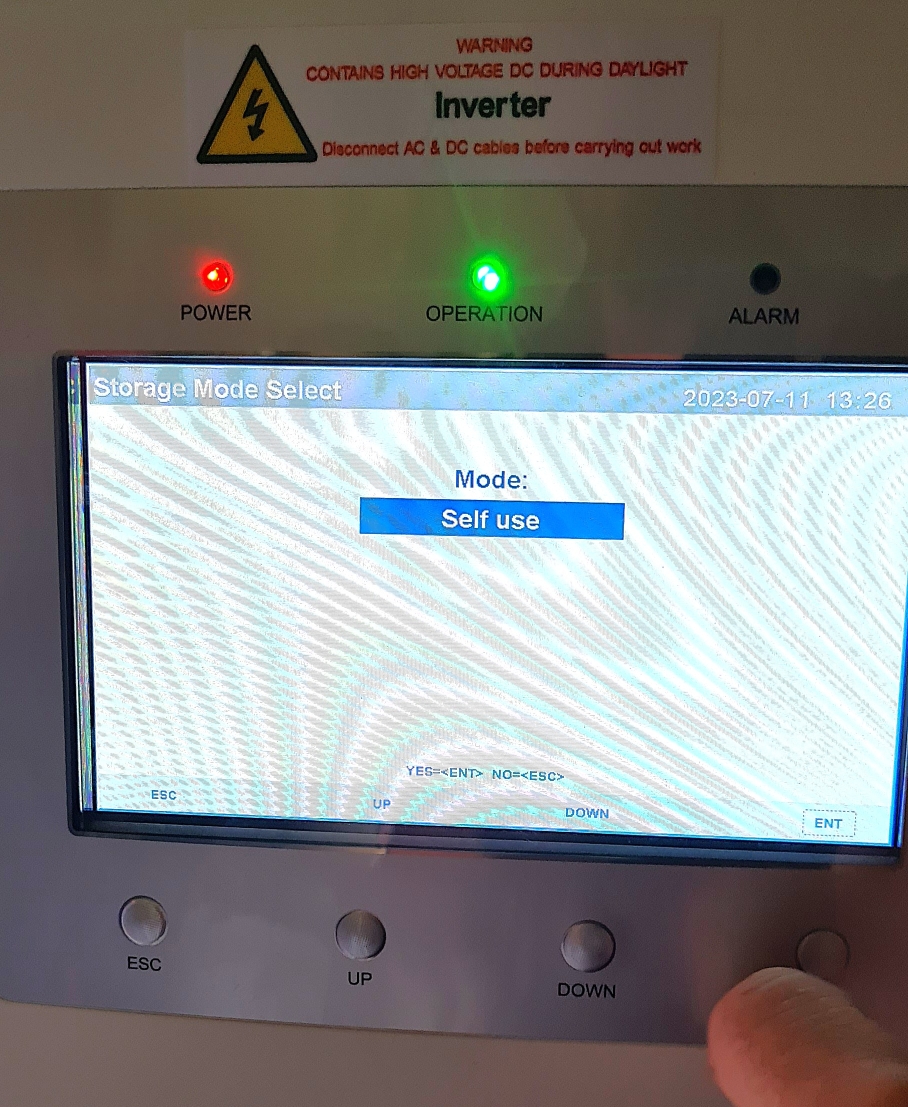
- Press enter followed by on
- Select "Time of use" to set time parameters
- Run or On must be selected depending on your version of the inverter. Press down to change from Stop or Off to Run or On
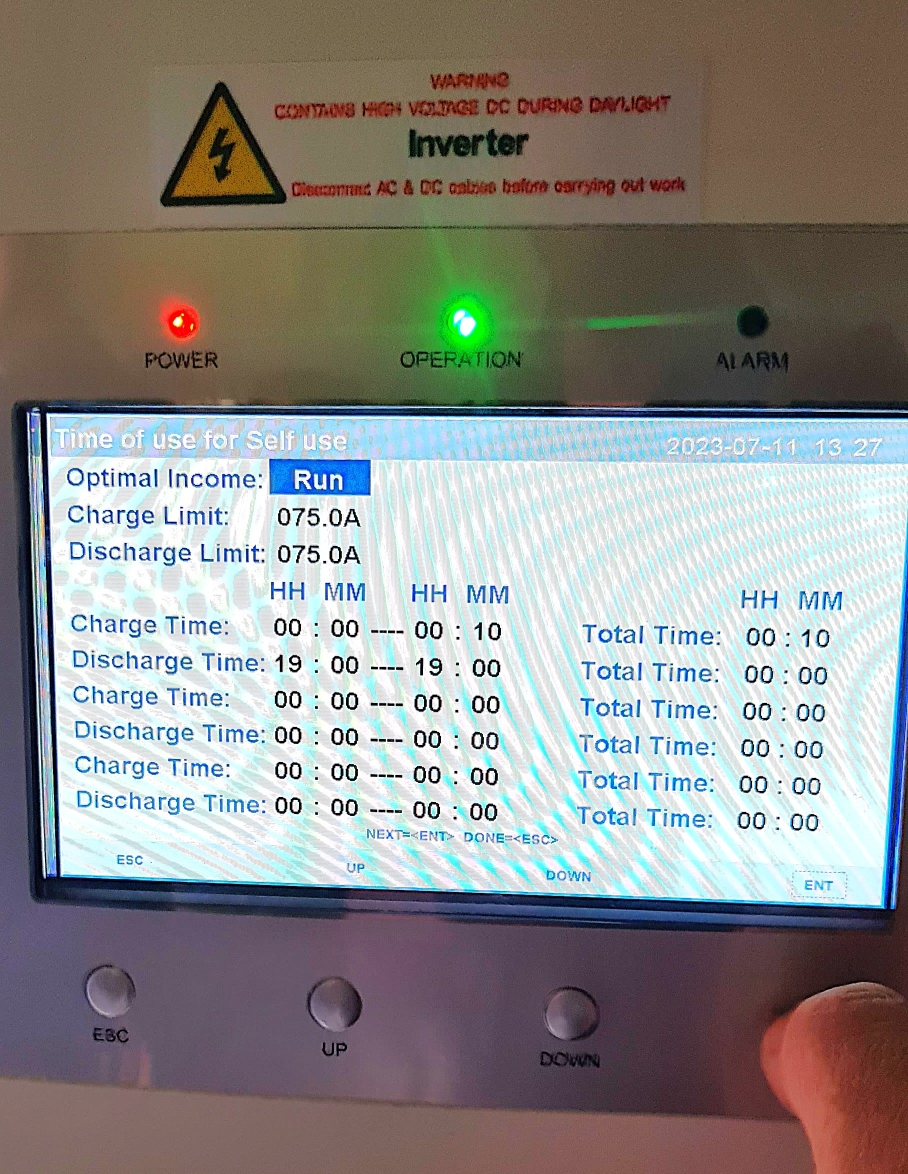
Cycle to the next parameter by pressing the enter button.
Step 5: Set charge and discharge limits
The charge and discharge limits can be changed. These limits are for forced charging and discharging purposes. These will be preset at 50A and we would not recommend going higher than 80A. Charging a battery slowly over a long period is better for the battery's health in the long run.
Step 6: Set charge times
Adjust the time values
Cycle down the parameters until you reach the first charge time parameter. These settings are a 24hr clock. Adjust the times by using the up and down buttons and press enter to go to the next time value.
Example time configuration
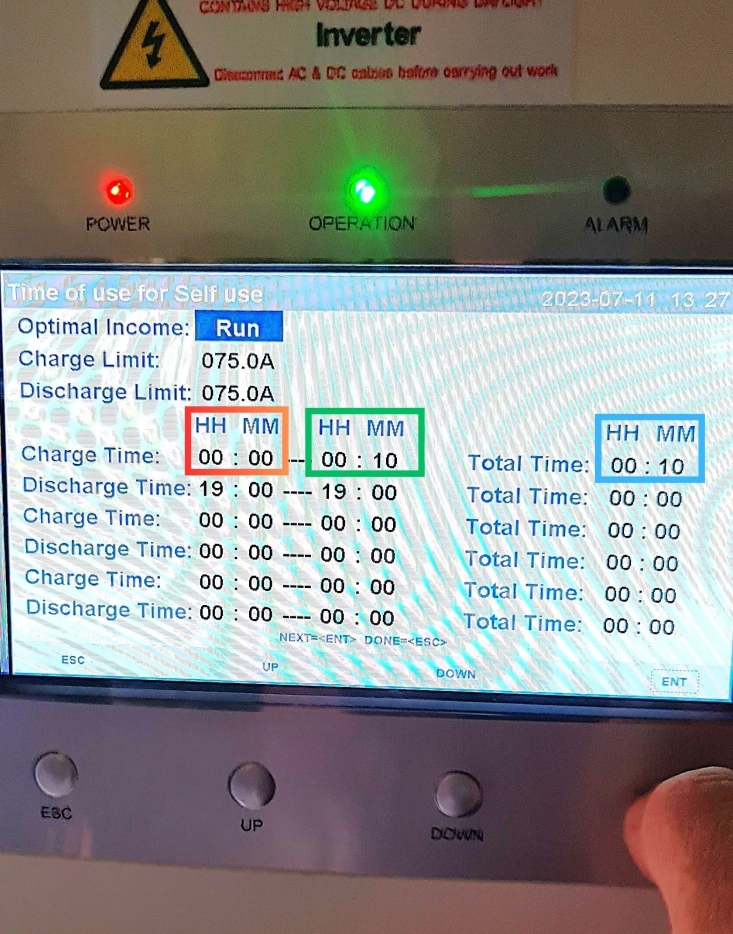
The settings below show a charge time starting at 00.00 (Red square) charging until 00.10 (Green square). The overall time that the batteries will charge is for 10 minutes. Displayed with the blue square.
Step 7: Set discharge times and save
Set discharge times
Discharge times start and end times should remain the same. These discharge times have no bearing on normal battery discharging. If times are inputted, the battery will discharge to the grid. If the start time and end time are the same, then the counter will remain at zero and the discharge program will not start.
Save the settings
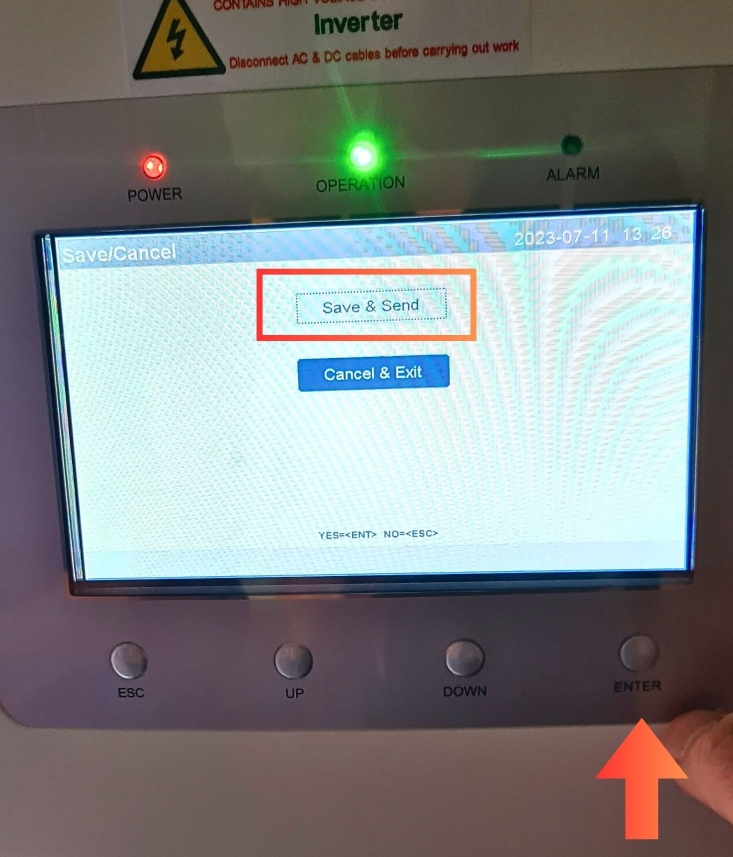
Press escape button to exit. Another menu will appear to ask to "Save and send". Press enter to save settings.
Step 8: Allow grid charging
Repeat this process for the next two screens until the "Self Use" menu is open.
Press down to highlight "Charging from grid" and press enter.

Select "Allow" and the system is now set up to charge from the grid between the hours previously entered.

Finished! You have successfully changed your battery timing, well done.
Inverter clock time
The inverter does connect to the internet, but it does not sync its internal clock online. This means that over time, the clock may drift slightly - running fast or slow - which can affect time-sensitive operations like aligning with electricity tariffs or scheduling EV charging. After a few years, it's a good idea to manually check and correct the time to ensure everything runs efficiently and as expected.
Need a hand?
If you are still having trouble changing your battery times, get in touch with your installation team at PureVolt.ie and we will be happy to help.